Siberian CMS is a self-hosted platform and we assume you already have a web hosting.
In case if you don't have a web hosting service currently, then please choose one from the below-mentioned web hosting packages:
https://www.ucartz.com/ucartz-buy-hosting
Installation of Siberian CMS on a WHM/cPanel
First of all, need to get an index.zip file from siberiancms.com. Once found, download and upload the .zip to your public directory.
Note: It won't work with your sub-directories.
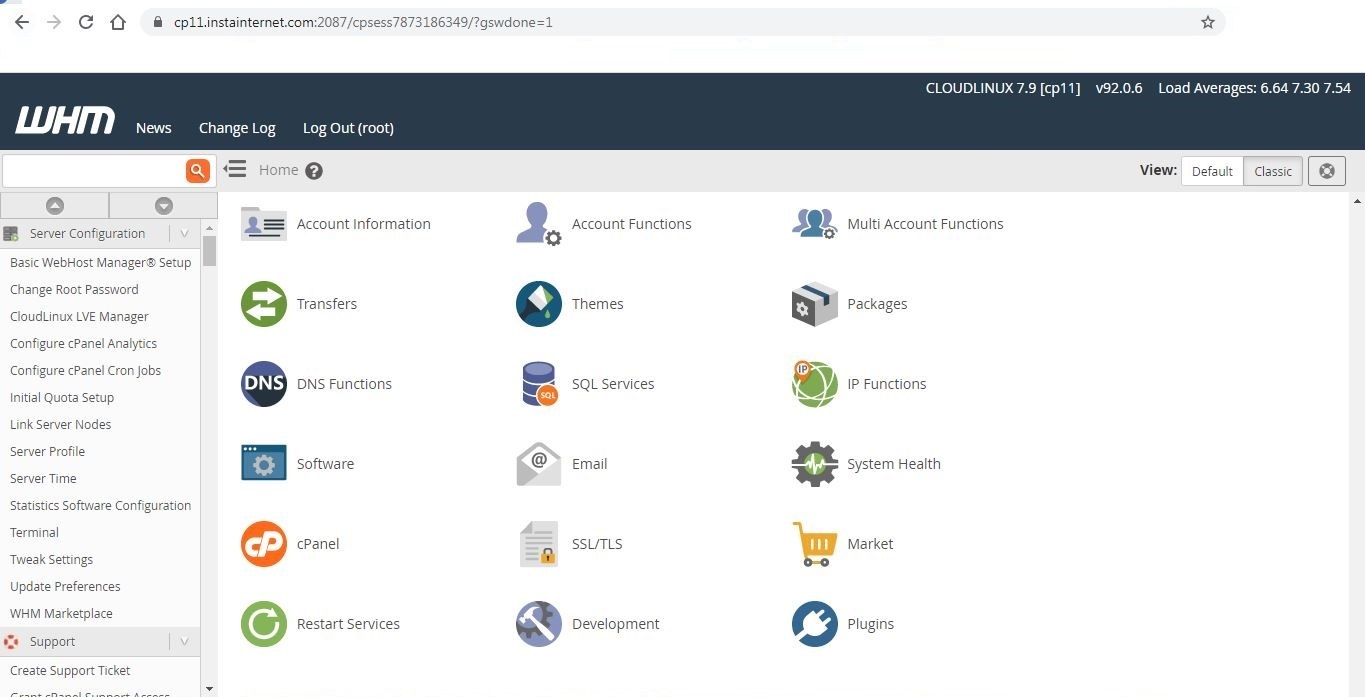
For eg, suppose you own domain-name.xyz. Then the Siberian will work as:
domain-name.xyz
test.domain-name.xyz
Create the webspace:
Assume that you already have a hosting account. So, to create the webspace for Siberian, you first have to create an account.
First login into your hosting account. At the top left corner, type “Create a New Account”. Now provide all the necessary details for the fields in the “Domain Information” section:
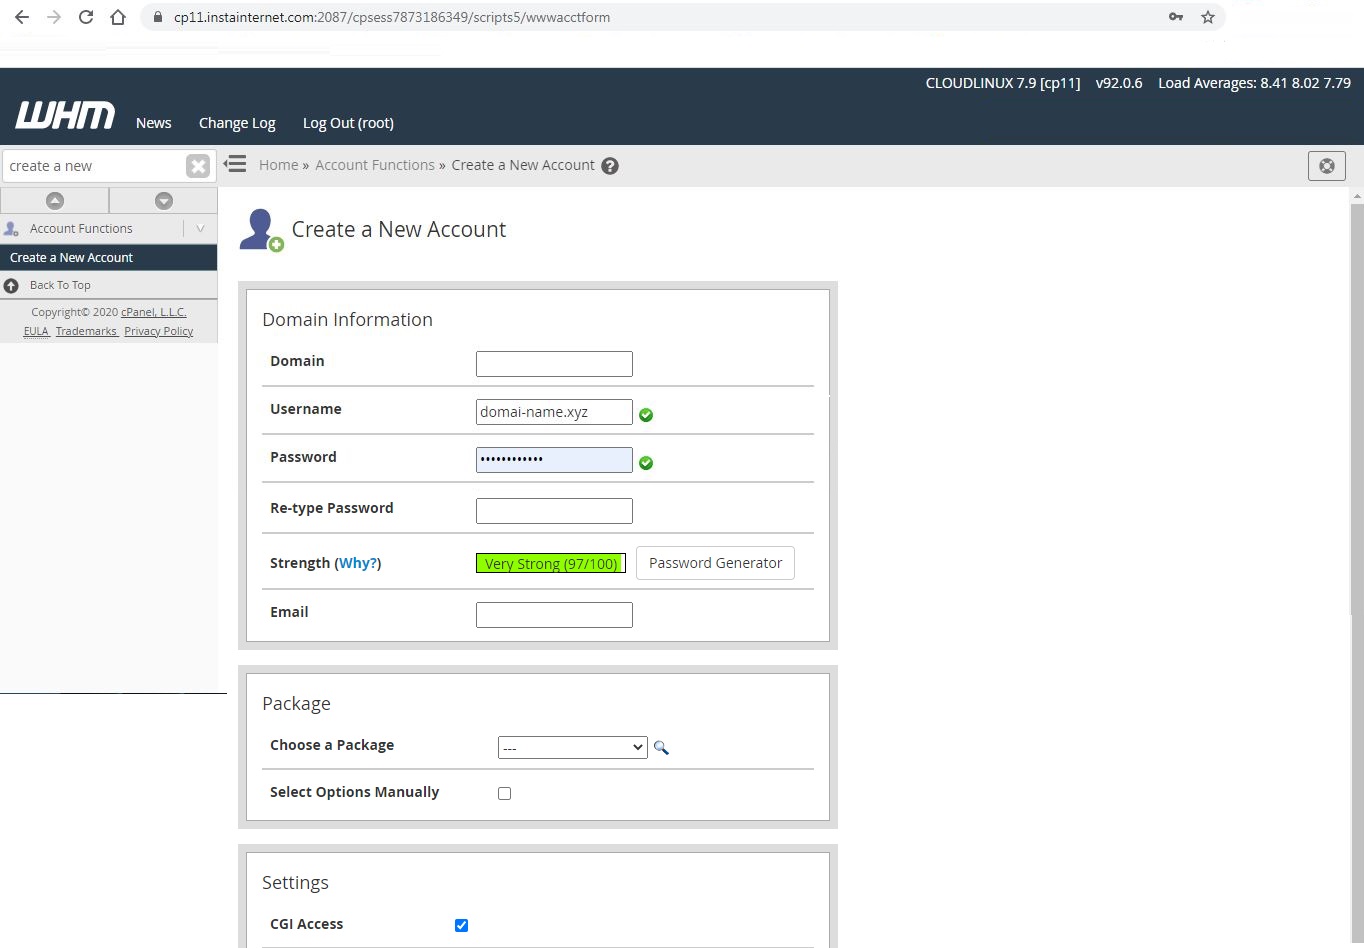
If you don't want to manually enter the values, you can also choose a package from the “Package” section to set up limits.
PHP Settings:
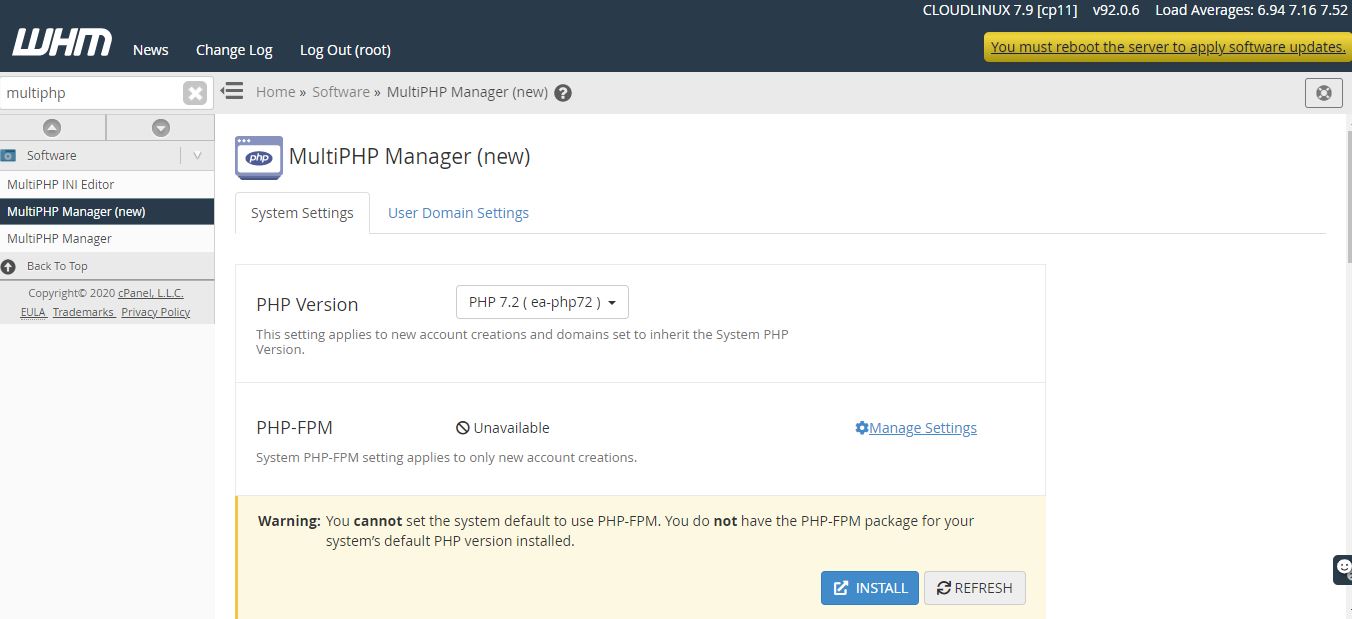
Once done with account setup. Now search for “MultiPHP Manager” in the search field. Choose PHP 7.3(ea-php73) for your webspace and set disable PHP-FPM:
Important Configuration Settings:
Here, you have to set the “Shell Access” to Normal. So lets now find the option in the search bar and for the same type “shell”. Now from the drop-down choose “Manage Shell Access”.
Make sure that your Domain is on Normal Shell, which is set to /bin/bash:

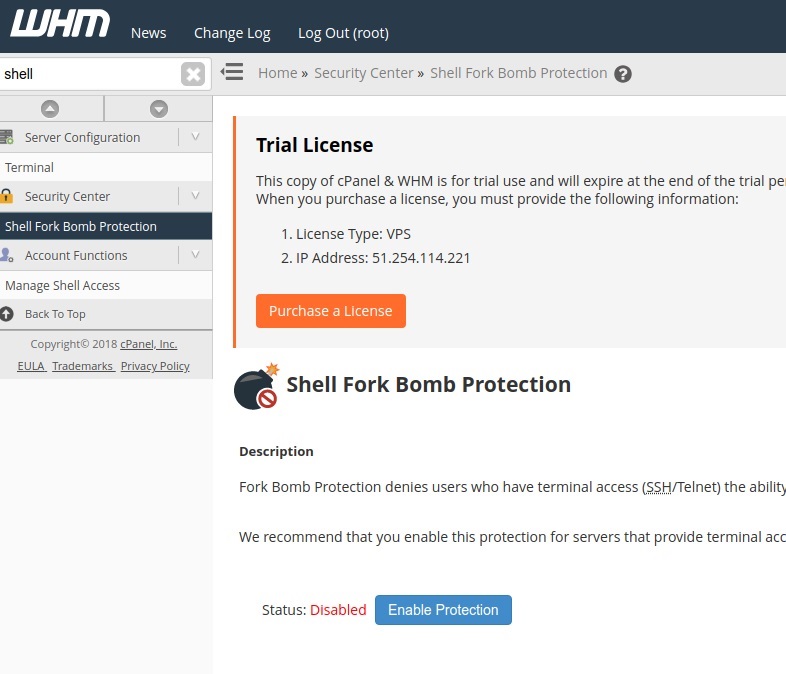
On the same page, click on “Shell Fork Bomb Protection” in the left menu. Make sure the protection is Disabled:
Next, you have to check if all the required PHP extensions are correctly installed. So, search for “EasyApache 4” in the search field. Click on next to “Currently Installed Packages”. Select “PHP Extensions” in the left menu, then Filter only php73:
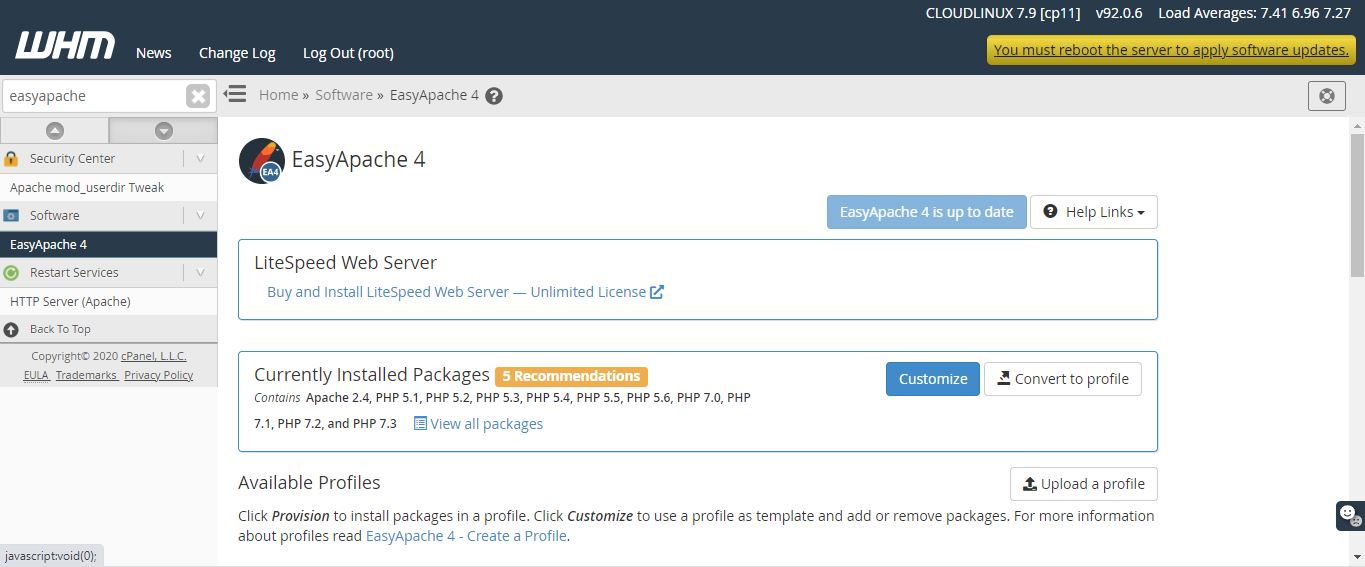
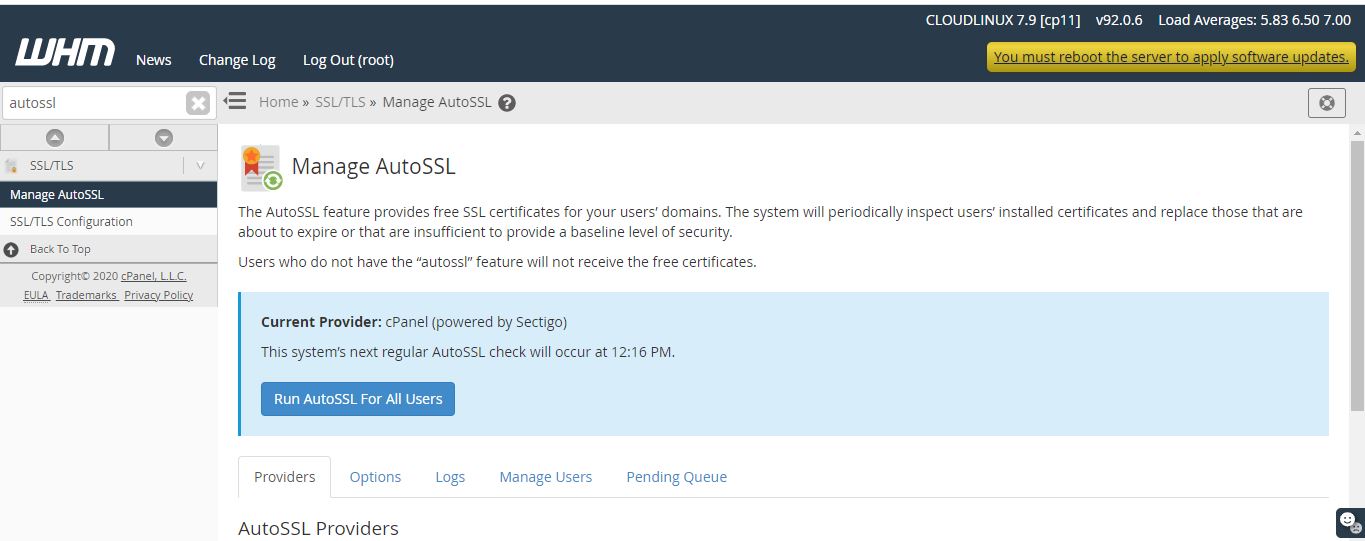
Now, we are going to deactivate AutoSSL for our domain. Search for “AutoSSL” in the search field, then click on the “Manage Users” section. Search for your domain, then click on “Disable AutoSSL”:
Search for “Manage SSL” in the search field:

Delete the SSL certificate linked to your Domain.
If you are a Platform Edition owner, you will have to configure WHM to allow White-Labels.
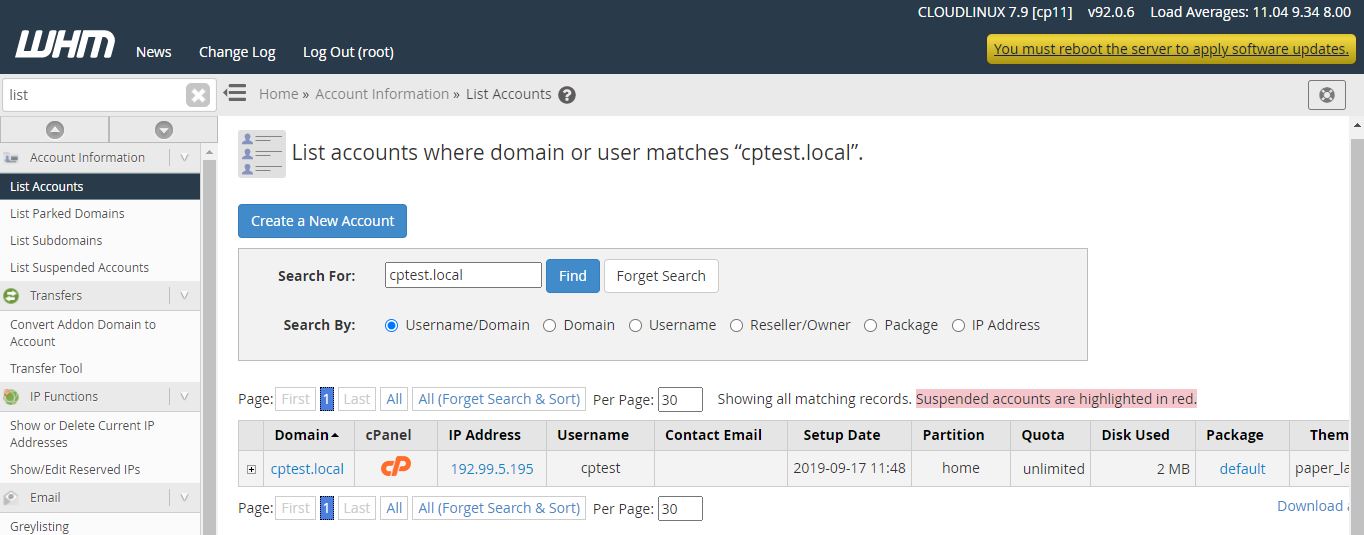
For the next parts, we are going to move to cPanel. Search for “List Accounts” in the search field. Next to your Domain, you have a cPanel logo. Click on it to reach cPanel:
Upload Index.php
Locate “File Manager” in the search field at the top of cPanel:

Now select your index.php, then upload the file under “public_html” folder.

Create the Database:
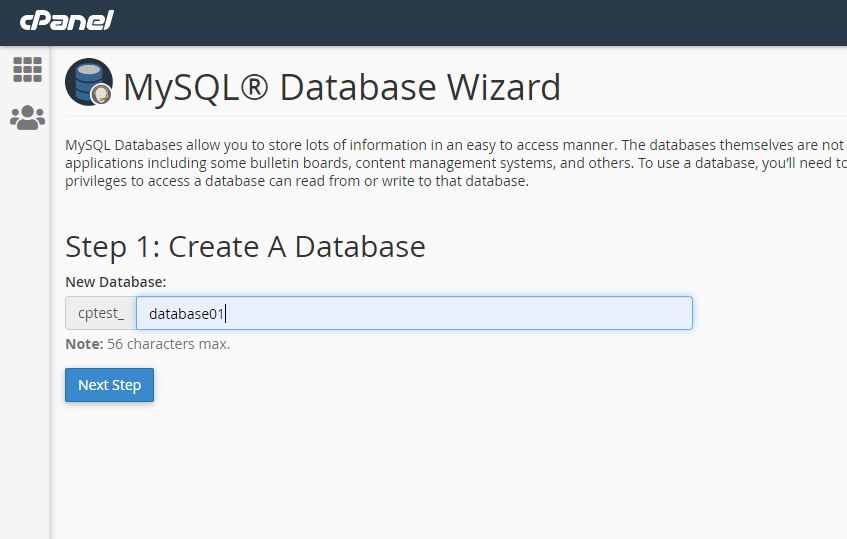
Search for “Databases” in the search field. From the section choose, MySQL Database Wizard. Here, enter a name for the new database, and click on Next Step.
Later, create the user for the Database:
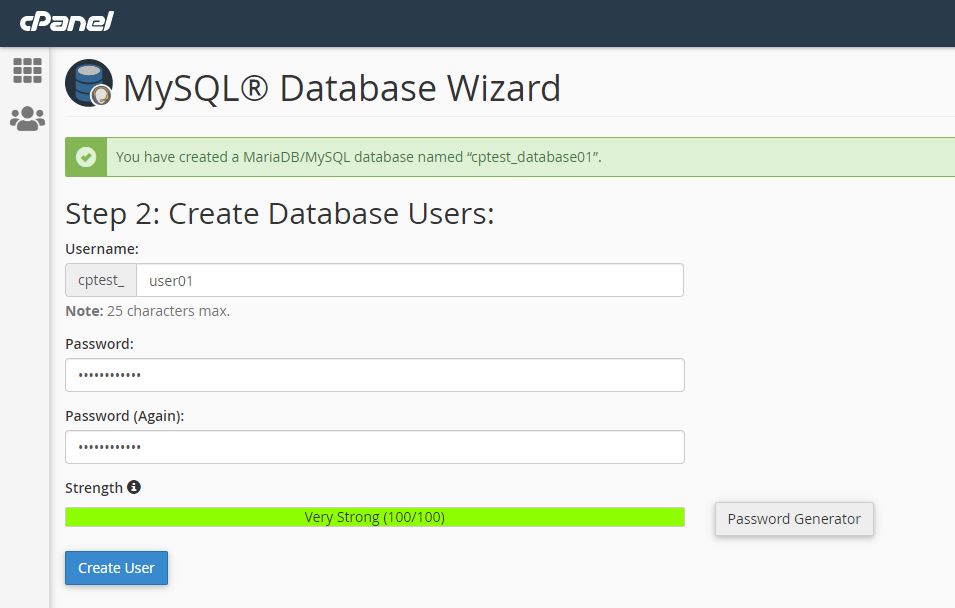
Finally, add the user to the database. For the same, we have to choose "all privileges", and click on Next Step.
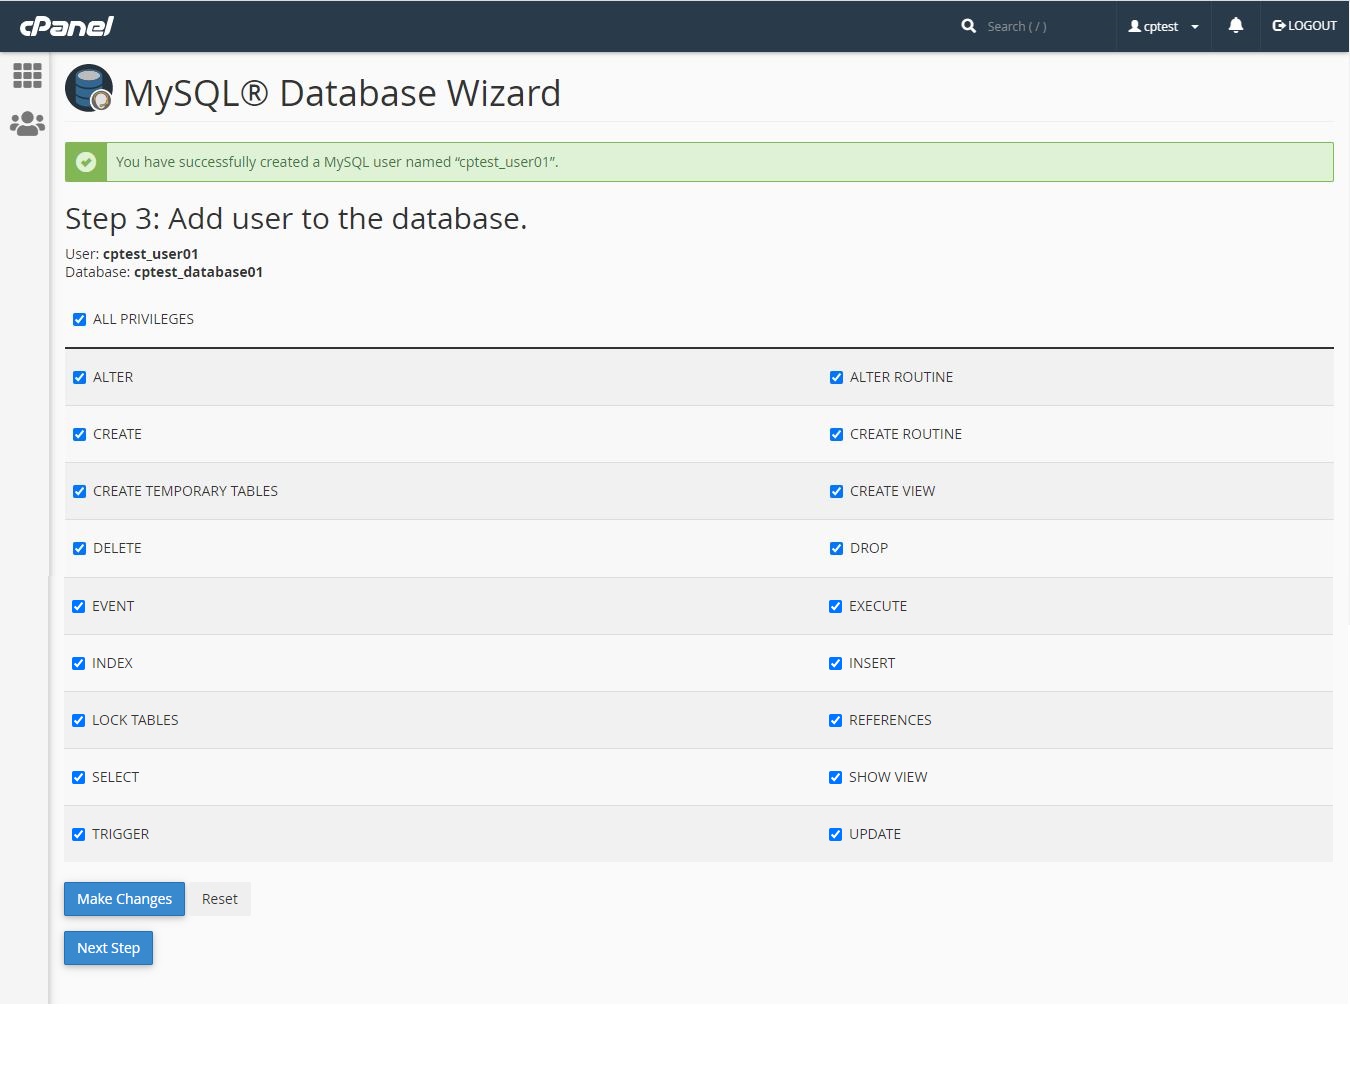
Installation Process:
Once all the above steps are done. Open a browser of your choice and type “https://cptest.local”.
Here, you will need to, enter your license number and you can find your license number in your purchase confirmation mail.
To start the installation, click on Download & Install.

Now read the Terms and conditions, tick the box if you agree, and click on.
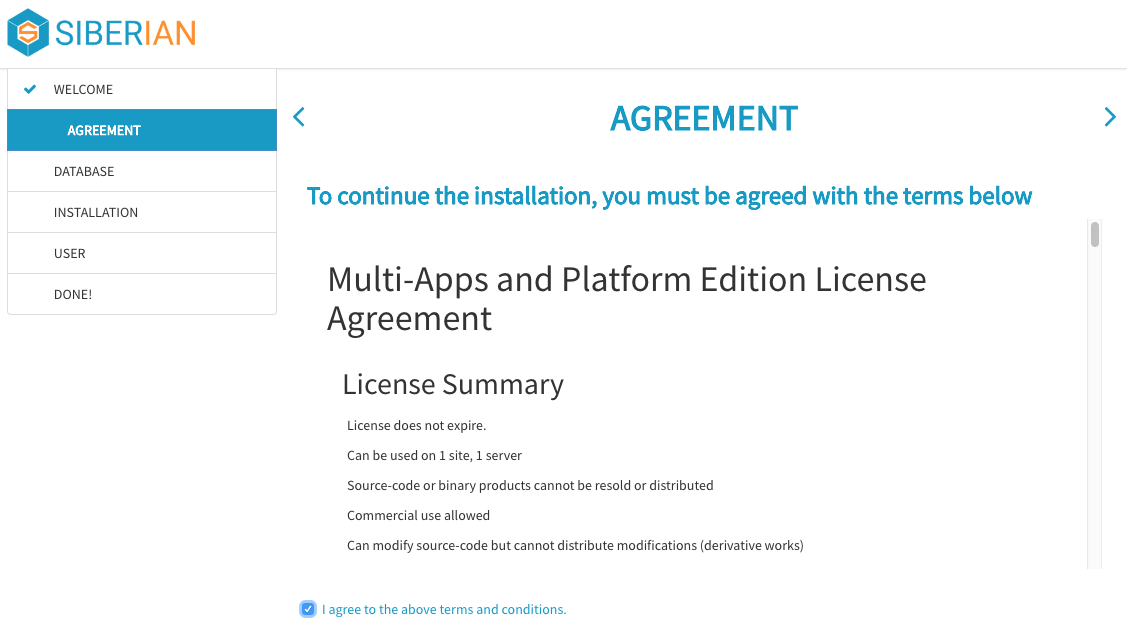
Provide the database credentials that we had set up earlier. Then click on:

Create your user account, then click on:

Congratulations, your Siberian is installed!


