Setting Up a Minecraft Server on Ubuntu
Firstly, we’ll create a Minecraft server using a VPS running on Ubuntu 16.04. The whole process can be broken down to three simple steps.
Step 1 – Installing Java and Screen
Before you begin, you need to connect to your server via SSH. To login to your server, open up the terminal (or use Putty SSH Terminal if you are on Windows) and type in the following command:
ssh username@ipaddress
Once logged in, you can formally start setting up your own Minecraft server. Keep in mind that Minecraft server setup requires Java to be installed on your system. You actually might already have Java installed on your system. To check this, execute the following command:
java -version
If you get a message which says Java was not found on your system, you can continue following the rest of these instructions. Otherwise, you are done with this section and can move on to step 2.
Run the following command in your terminal to download the latest packages of software installed on your system, including Java:
sudo apt-get update
Now you need to install Java. We are installing Java 17 for this tutorial:
sudo apt-get install openjdk-7-jdk
Just in case you want the latest version of Java, you can run the following instead of the above command:
sudo apt-get install default-jdk
Here we should also install screen, which will ensure that your server keeps running in the background even if you drop the connection. To do this, type in the following and execute:
sudo apt-get install screen
You should now have Java and Screen installed on your system.
Step 2 – Installing Minecraft Server on Ubuntu
With the pre-requisites out of the way, we can now focus on installing the Minecraft server on Ubuntu VPS. It is always better to keep things clean and tidy. To avoid making a mess, create a new directory which will hold all your Minecraft files in one location. This step is optional, though for the sake of your sanity, we highly recommend it. To make a new directory, run this:
mkdir minecraft
Once created, move inside the newly created directory by typing the following:
cd minecraft
Next, you need to have wget on your system. If you don’t already have it installed, simply execute the following command:
sudo apt-get install wget
Now download and install your own Minecraft server:
wget -O minecraft_server.jar https://s3.amazonaws.com/Minecraft.Download/versions/1.11.2/minecraft_server.1.11.2.jar
At the time of the writing, the latest version available is 1.11.2. You should replace this number with whatever the latest version is at the time. To check, visit this link.
Accept Minecraft’s end-user license agreement:
echo "eula=true" > eula.txt
Get screen up and running, so that the server can run in the background:
screen -S "Minecraft server 1"
We’ve named the current session ‘Minecraft server 1’, but you can use any other name instead.
And that’s it – you have successfully installed your custom Minecraft server on Ubuntu.
Step 3 – Running Minecraft Server
Now you only need to run the installed server. To achieve this, run the following in the terminal:
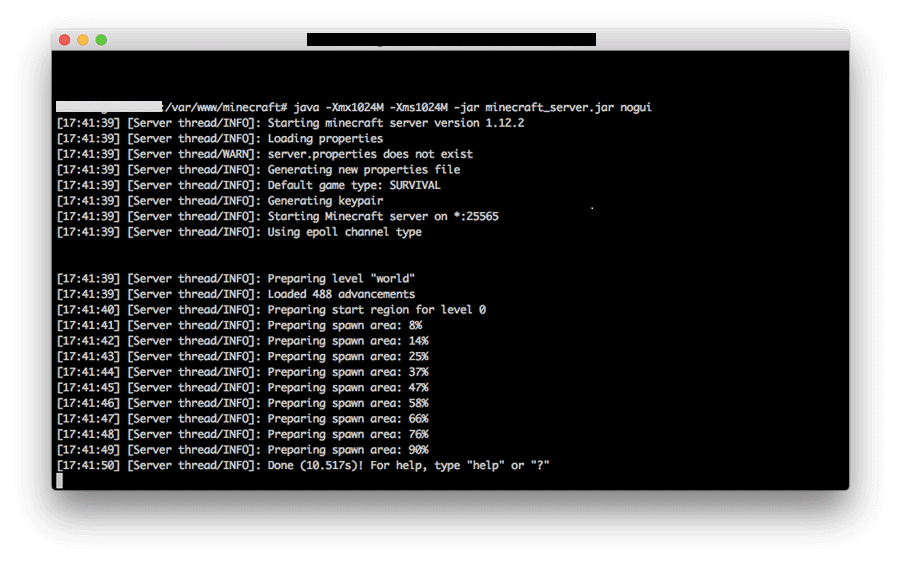
java -Xmx1024M -Xms1024M -jar minecraft_server.jar nogui
As you can see, Minecraft requires you to have 1024MB or 1GB of RAM available to boot up the server. While this is the minimum requirement, we recommend having more RAM on board for better performance. To allocate more memory to the server, simply replace 1024 in the -Xmx and -Xms parameters with 2048 (2GB) and so on. Here’s what you should see after executing the command:
And there you have it: your very own Minecraft server setup in merely minutes. The server is running in the background, as per our use of screen. To opt out of screen, press CTRL + A, then D. You can undo this and re-open screen’s window by typing screen -r in the terminal. Finally, you can fiddle around with your server’s settings through the server properties file:
nano ~/minecraft/server.properties
Setting Up a Minecraft Server on CentOS 7
Let’s see how to make a Minecraft server on a VPS running CentOS 7. The process is slightly different compared to Ubuntu.
Step 1 – Installing Java and Screen
Firstly, you will have to install Java as Minecraft is built purely on it. Next package will be Screen, it is required for the Minecraft server to work once the SSH session ends. Connect to your VPS server via SSH (Windows users can use Putty SSH client for this) and run this command to install both packages:
yum install java screen -y
Step 2 – Installing Minecraft Server on CentOS 7
In order to organize the installation, you should create a dedicated directory for Minecraft by running this command:
mkdir minecraft
Then just change the working directory to the one that you have just created:
cd minecraft
Download Minecraft server package:
wget -O minecraft_server.jar https://s3.amazonaws.com/Minecraft.Download/versions/1.10.2/minecraft_server.1.10.2.jar
Start the Screen with adequate name:
screen -S "Minecraft server"
Accept EULA agreement by changing the value from false to true in eula.txt file. Use this command to edit the file:
nano eula.txt
Step 3 – Running Minecraft Server
Finally, you can run the server using this command:
java -Xmx1024M -Xms1024M -jar minecraft_server.jar nogui
It should display something like: 
The Minecraft server has been successfully started, you can exit the Screen using CTRL-A + D keyboard shortcut.
Settings of the server can be changed by editing the options file:
nano server.properties


