Introduction
YunoHost is an open-source platform that facilitates the seamless installation and configuration of self-hosted web applications, including webmail clients, password managers, and even WordPress sites. Self-hosting webmail and other applications provide privacy and control over your personal information. YunoHost allows you to configure settings, create users, and self-host your own applications from its graphical user interface. A marketplace of applications is available through YunoHost to add to your hosting environment. The frontend UI acts as a homepage for all of your applications.
In this tutorial, you will install and configure YunoHost on a server running Debian 9. To achieve this, you will configure your DNS records using DigitalOcean, secure your YunoHost instance with Let's Encrypt, and install your chosen web applications.
Prerequisites
- One Debian 9 server with at least 1 GB of memory, with a sudo non-root user and firewall configured on your server.
- A domain name configured to point to your server.
Step 1 — Installing YunoHost
In this step, you will install YunoHost using the official installation script. YunoHost provides this open-source script that guides you through installing and configuring everything necessary for a YunoHost operation.
Before you download the install script, move into a temporary directory. Using the /tmp directory will delete the script on reboot, which you will not need after you've installed YunoHost:
cd /tmp
Next, run the following command to download the official install script from YunoHost:
wget -O yunohost https://install.yunohost.org/
This command downloads the script and saves it to the current directory as a file called yunohost.
Now you can run the script with sudo:
sudo /bin/bash yunohost
When asked to overwrite configuration files, select yes. Now you will then see a Post-installation screen confirming YunoHost's installation. Select Yes to proceed to the post-installation process.
When asked to enter the Main domain, enter the domain name you want to use to access your YunoHost instance. Then choose and enter a secure password for the administrator account.
You have now installed YunoHost on your server. In the next step, you will log in to your fresh YunoHost instance to configure and manage domains.
Step 2 — Configuring DNS
Now you have YunoHost installed, you can access the admin panel for the first time. You will set up the domain where you would like to host YunoHost by configuring your DNS records.
To start, type either the IP address of your server or the domain name you chose in the last step into your web browser. You'll see a screen warning that your connection is not private.

The connection is not yet secure because YunoHost uses a self-signed certificate by default. You can visit the site anyway since you'll secure your site with Let's Encrypt in the next step.
Now, enter the admin password you set in the previous step to access YunoHost's admin panel.

In order for YunoHost to function properly, you will configure the DNS settings for your domain name. From the admin panel, navigate to the Domains section and select your domain name. You'll now see the Operations page where you can access the DNS configuration settings.
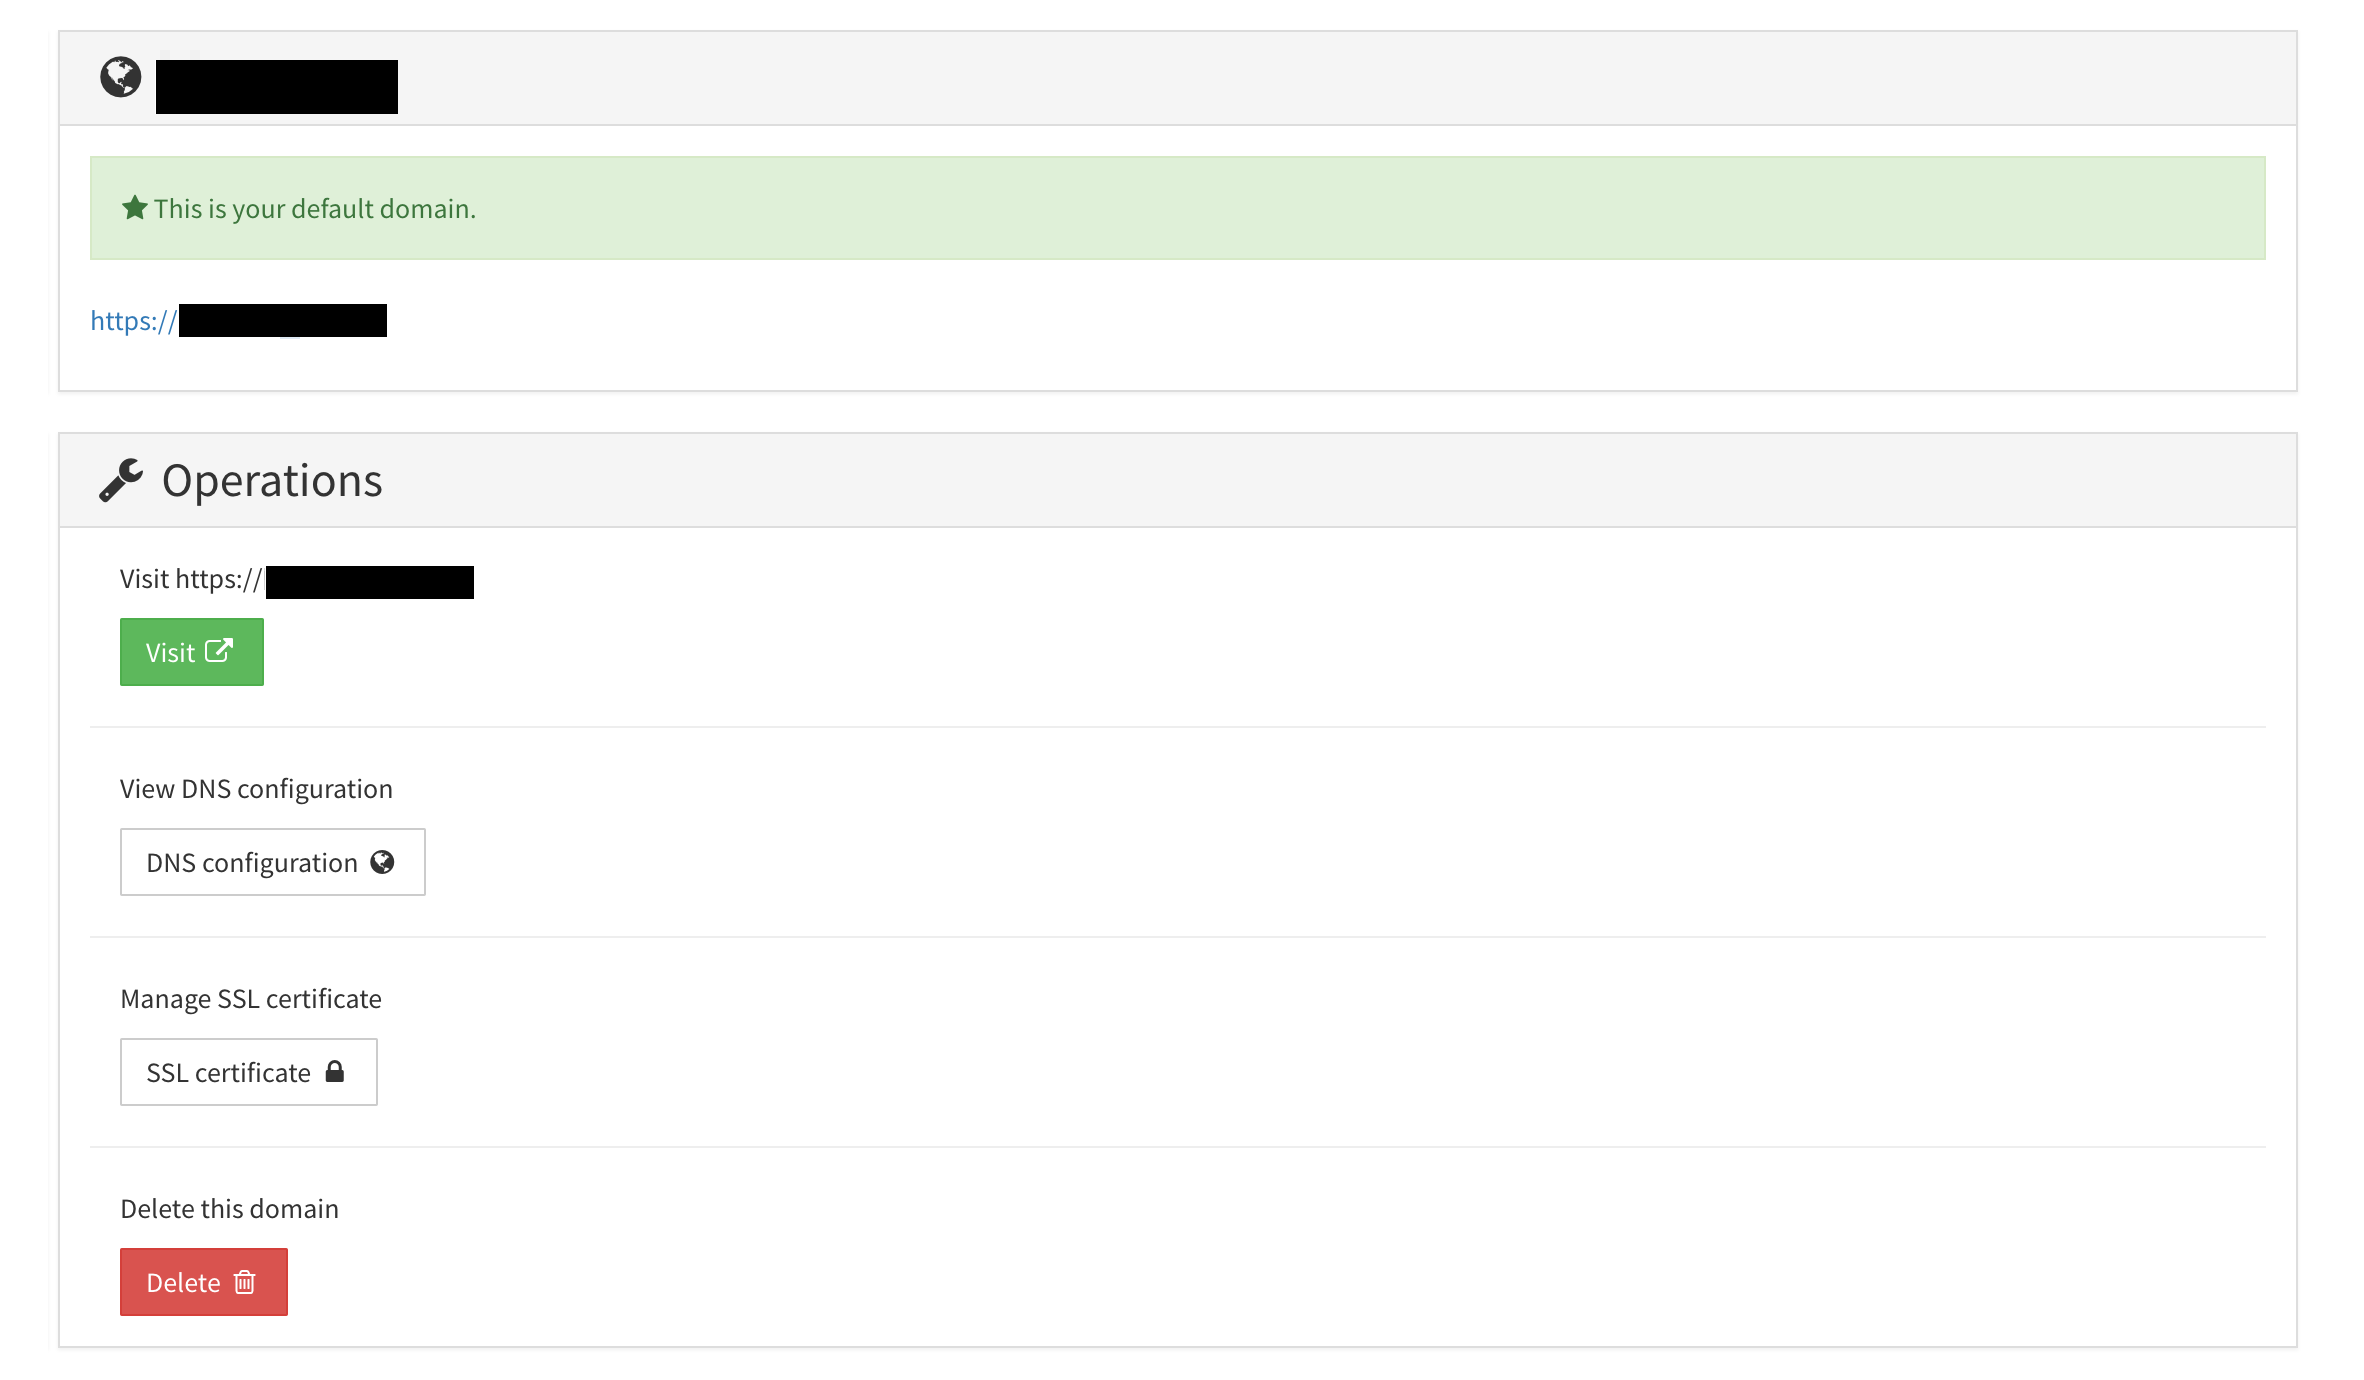
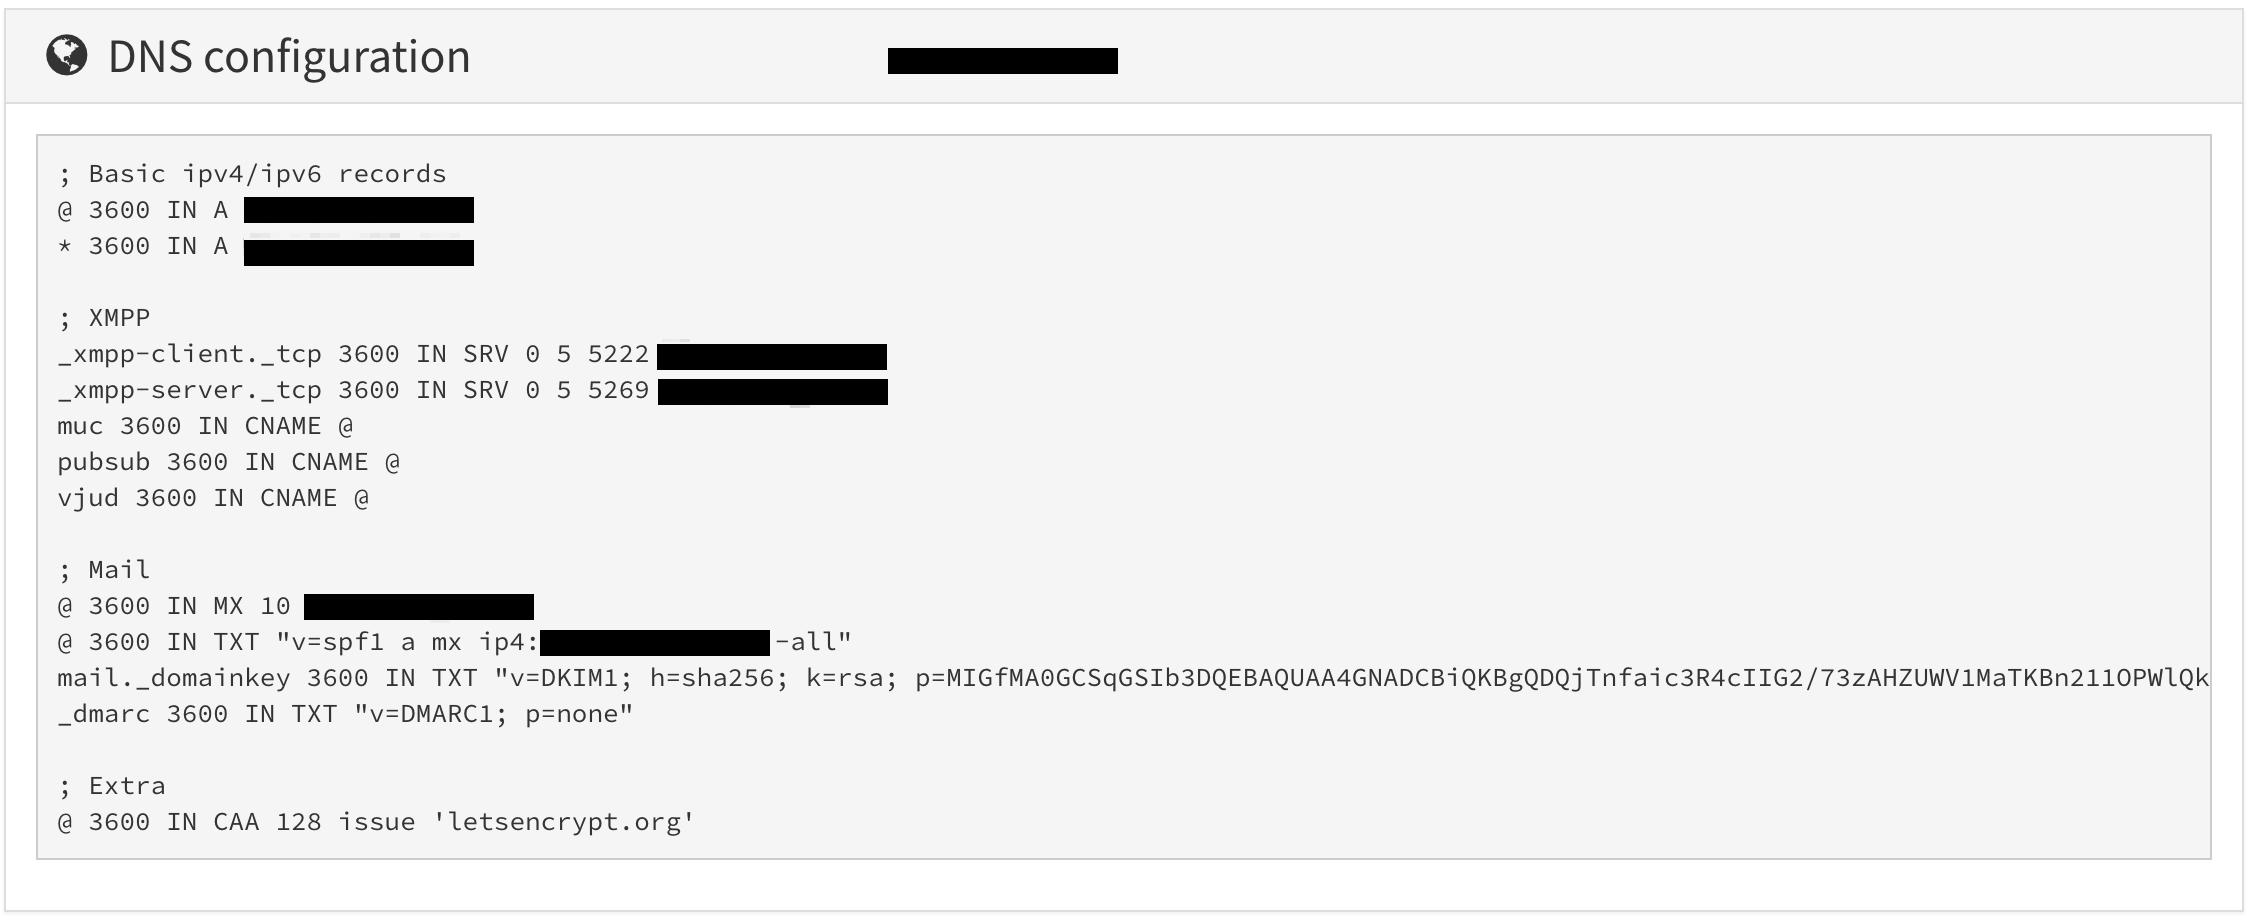
Select the DNS configuration button. YunoHost will display a sample zone file for your domain. You'll use this file to configure the records for your domain.
To start configuring your DNS records, access your domain host. This tutorial walks through configuring DNS records via DigitalOcean's control panel.
Log in to your DigitalOcean account and click on Networking in the menu. Enter your YunoHost domain in the Domain field and click Add Domain.
You'll be taken to your domain name's edit page. On this page, you'll see the fields where you can add the YunoHost records.

There will be three NS records already set up that specify the DigitalOcean servers are providing DNS services for your domain. You can now add the following records using the sample file provided by YunoHost:
Create two new A records:
- Enter @ for the name and choose your Droplet or IP address in the Will Direct To box, leave the TTL at 3600.
- Enter * for the name and choose your Droplet or IP address in the Will Direct To box, leave the TTL at 3600.
Create two new SRV records:
- Enter _xmpp-client._tcp for the hostname, 5222 for the port, 0 priority, 5 for the weight, and change the TTL to 3600.
- Enter _xmpp-server._tcp for the hostname, 5269 for the port, 0 priority, 5 for the weight, and change the TTL to 3600.
Create three new CNAME records:
- Enter muc for the hostname, @ in is an alias of, and set the TTL to 3600.
- Enter pubsub for the hostname, @ in is an alias of, and set the TTL to 3600.
- Enter vjud for the hostname, @ in is an alias of, and set the TTL to 3600.
For your Mail configuration, create the following records:
- An MX record with @ for the hostname, your domain name for the mail server with a priority of 10 and the TTL at 3600.
- Three new TXT records:
- Copy the TXT string, including the double quotes, from the sample zone file into the value box that starts with: "v=spf1", add @to the hostname, and leave the TTL at 3600.
- Copy the long TXT string, including the double quotes, from the sample zone file into the value box, add mail._domainkey to the hostname, and leave the TTL at 3600.
- Copy the TXT string, including the double quotes, from the sample zone file into the value box, something like: "v=DMARC1; p=none", add _dmarcto the hostname, and leave the TTL at 3600.
And finally, for Let's Encrypt, configure the following record:
- Create a new CAA record:
- Enter @ for the hostname, add letsencrypt.org to the authority granted for box, set tag to issue, flags to 128, and set the TTL to 3600.
Once you have added all of the DNS records you'll see a list on your domain's control panel.
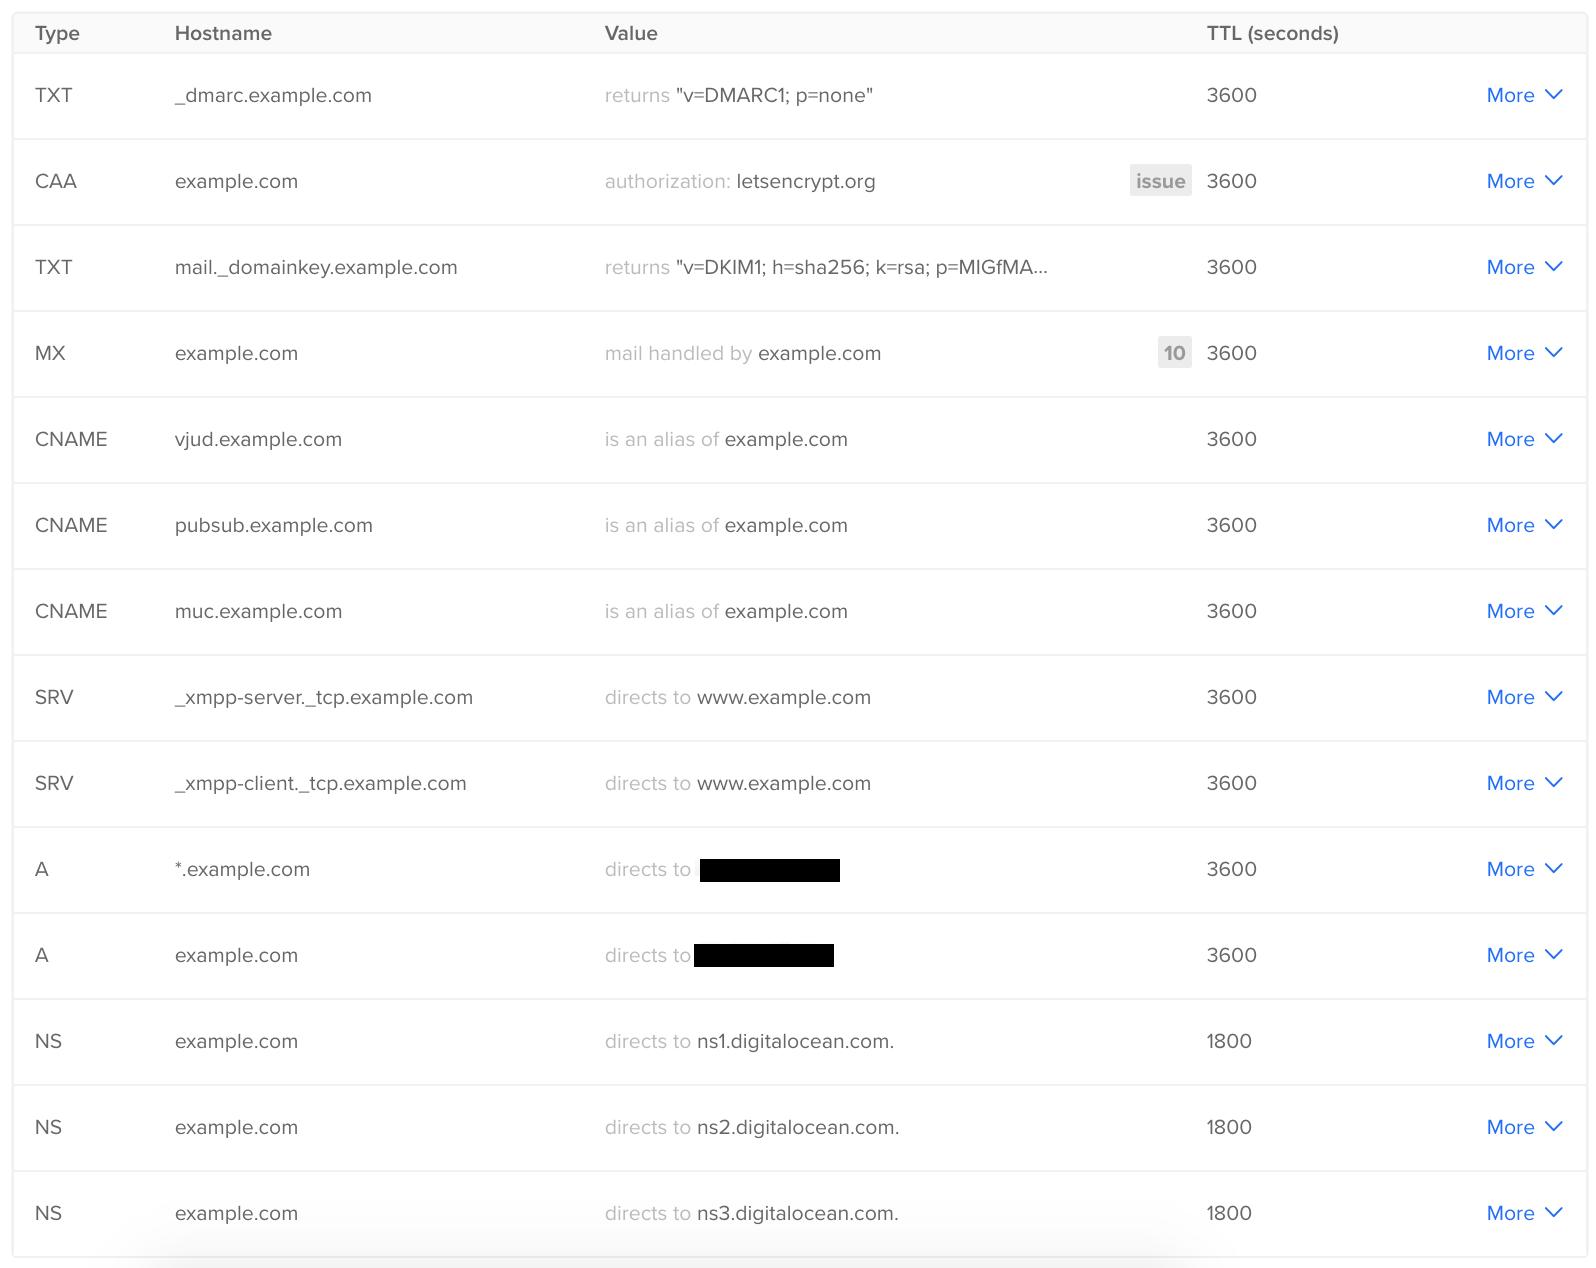
You have configured all the DNS records necessary for the YunoHost services to work. In the next step you'll secure your connection by installing Let's Encrypt.
Step 3 — Installing Let's Encrypt
In this step, you will configure an SSL certificate via Let's Encrypt to ensure that your connection is secured by encrypted HTTPS each time you or users log in to your site. YunoHost includes a function to install Let's Encrypt to your domain through the user interface.
In the Domains section of the admin panel, select your domain name again. Navigate down to the Operations section. From here, under Manage SSL certificates, select SSL certificates. You'll see an option to Install a Let's Encrypt certificate, you can select this to install the certificate.
You will now have a Let's Encrypt certificate installed for your domain. You will no longer see the warning messages when you visit your domain or IP address. Your Let's Encrypt certificate will automatically renew by default. To manually renew your Let's Encrypt certificate or revert to a self-signed certificate in the future, you can use this Operations page.
You have configured and secured your domain. In the next section you'll set up a new user and email account to begin installing applications to your YunoHost operation.
Step 4 — Installing Applications
YunoHost provides the ability to install a number of pre-packaged web applications alongside each other. To begin installing and using applications, you need to create a regular, non-admin user and email account. You can do this through the admin panel.
From the root of the admin panel, navigate to the Users section. Select the green New user button to the right of your screen. Enter the desired credentials for the new user in the fields provided.
You've finished creating the user. By default, this user already has an associated email address, which you can access through any IMAP email client. Alternatively, you can install a webmail client on YunoHost to accomplish this, which you will do as part of this tutorial.
You have configured all of YunoHost's basic functions and created a user, complete with an email account. You can now access the applications through the admin panel that are ready for installation. In this tutorial, you'll install Rainloop, a lightweight webmail app, but you can follow these instructions to install any of the available applications.
Navigate to the Applications section of the admin panel. From here, you can select and install any of the official applications.
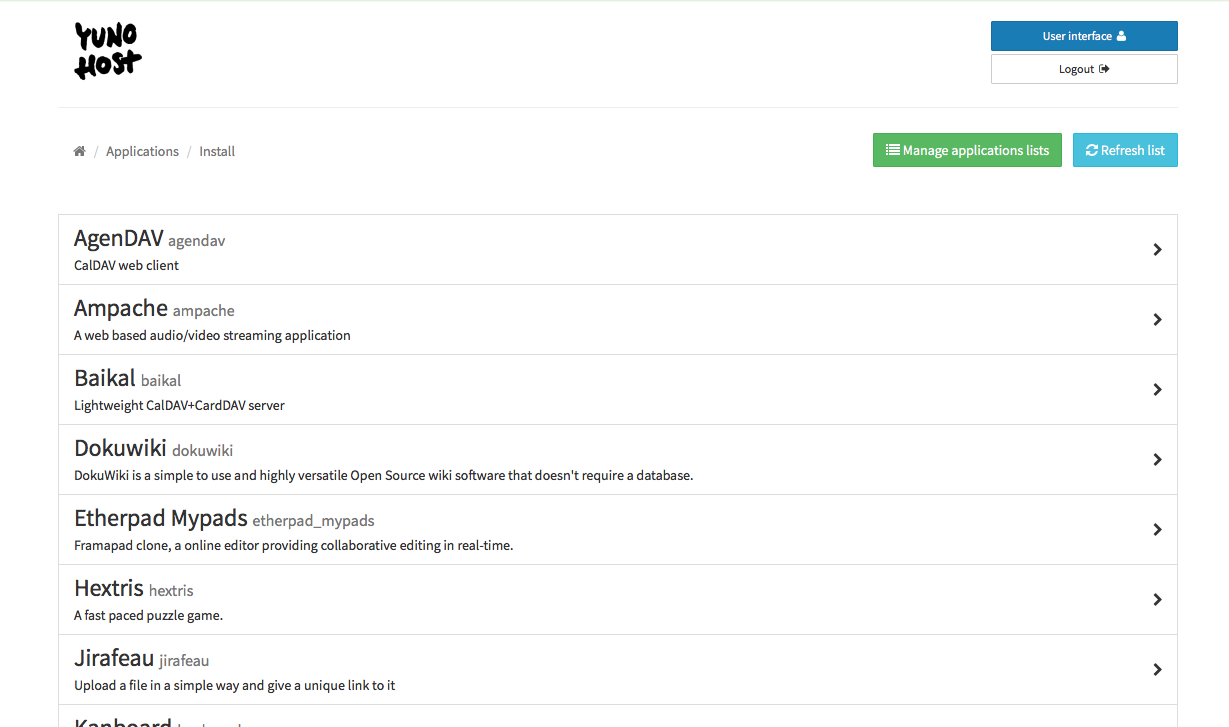
Select Rainloop from the list. You will see some configuration options for the application.

- Label for Rainloop: You can choose what to enter here, the application displays this to users on YunoHost's home screen.
- Choose a domain for Rainloop: Enter the domain name that will host the application.
- Choose a path for Rainloop: Set the URL path for the application, like /rainloop. If you'd like it to be at the root of the domain, simply enter /. Keep in mind that if you do so, you will not be able to use any other applications with that domain.
- Is it a public application?: Choose if you want the application to be accessible to the public, or only to logged in users.
- Enter a strong password for the 'admin' user: Enter a password for the admin user of the application.
- Do you want to add YunoHost users to the recipients' suggestions?: "Yes" here will result in the application suggesting other users' email addresses and names as recipients when composing emails.
- Select the default language: Select your preferred language.
Once finished, click the green Install button.
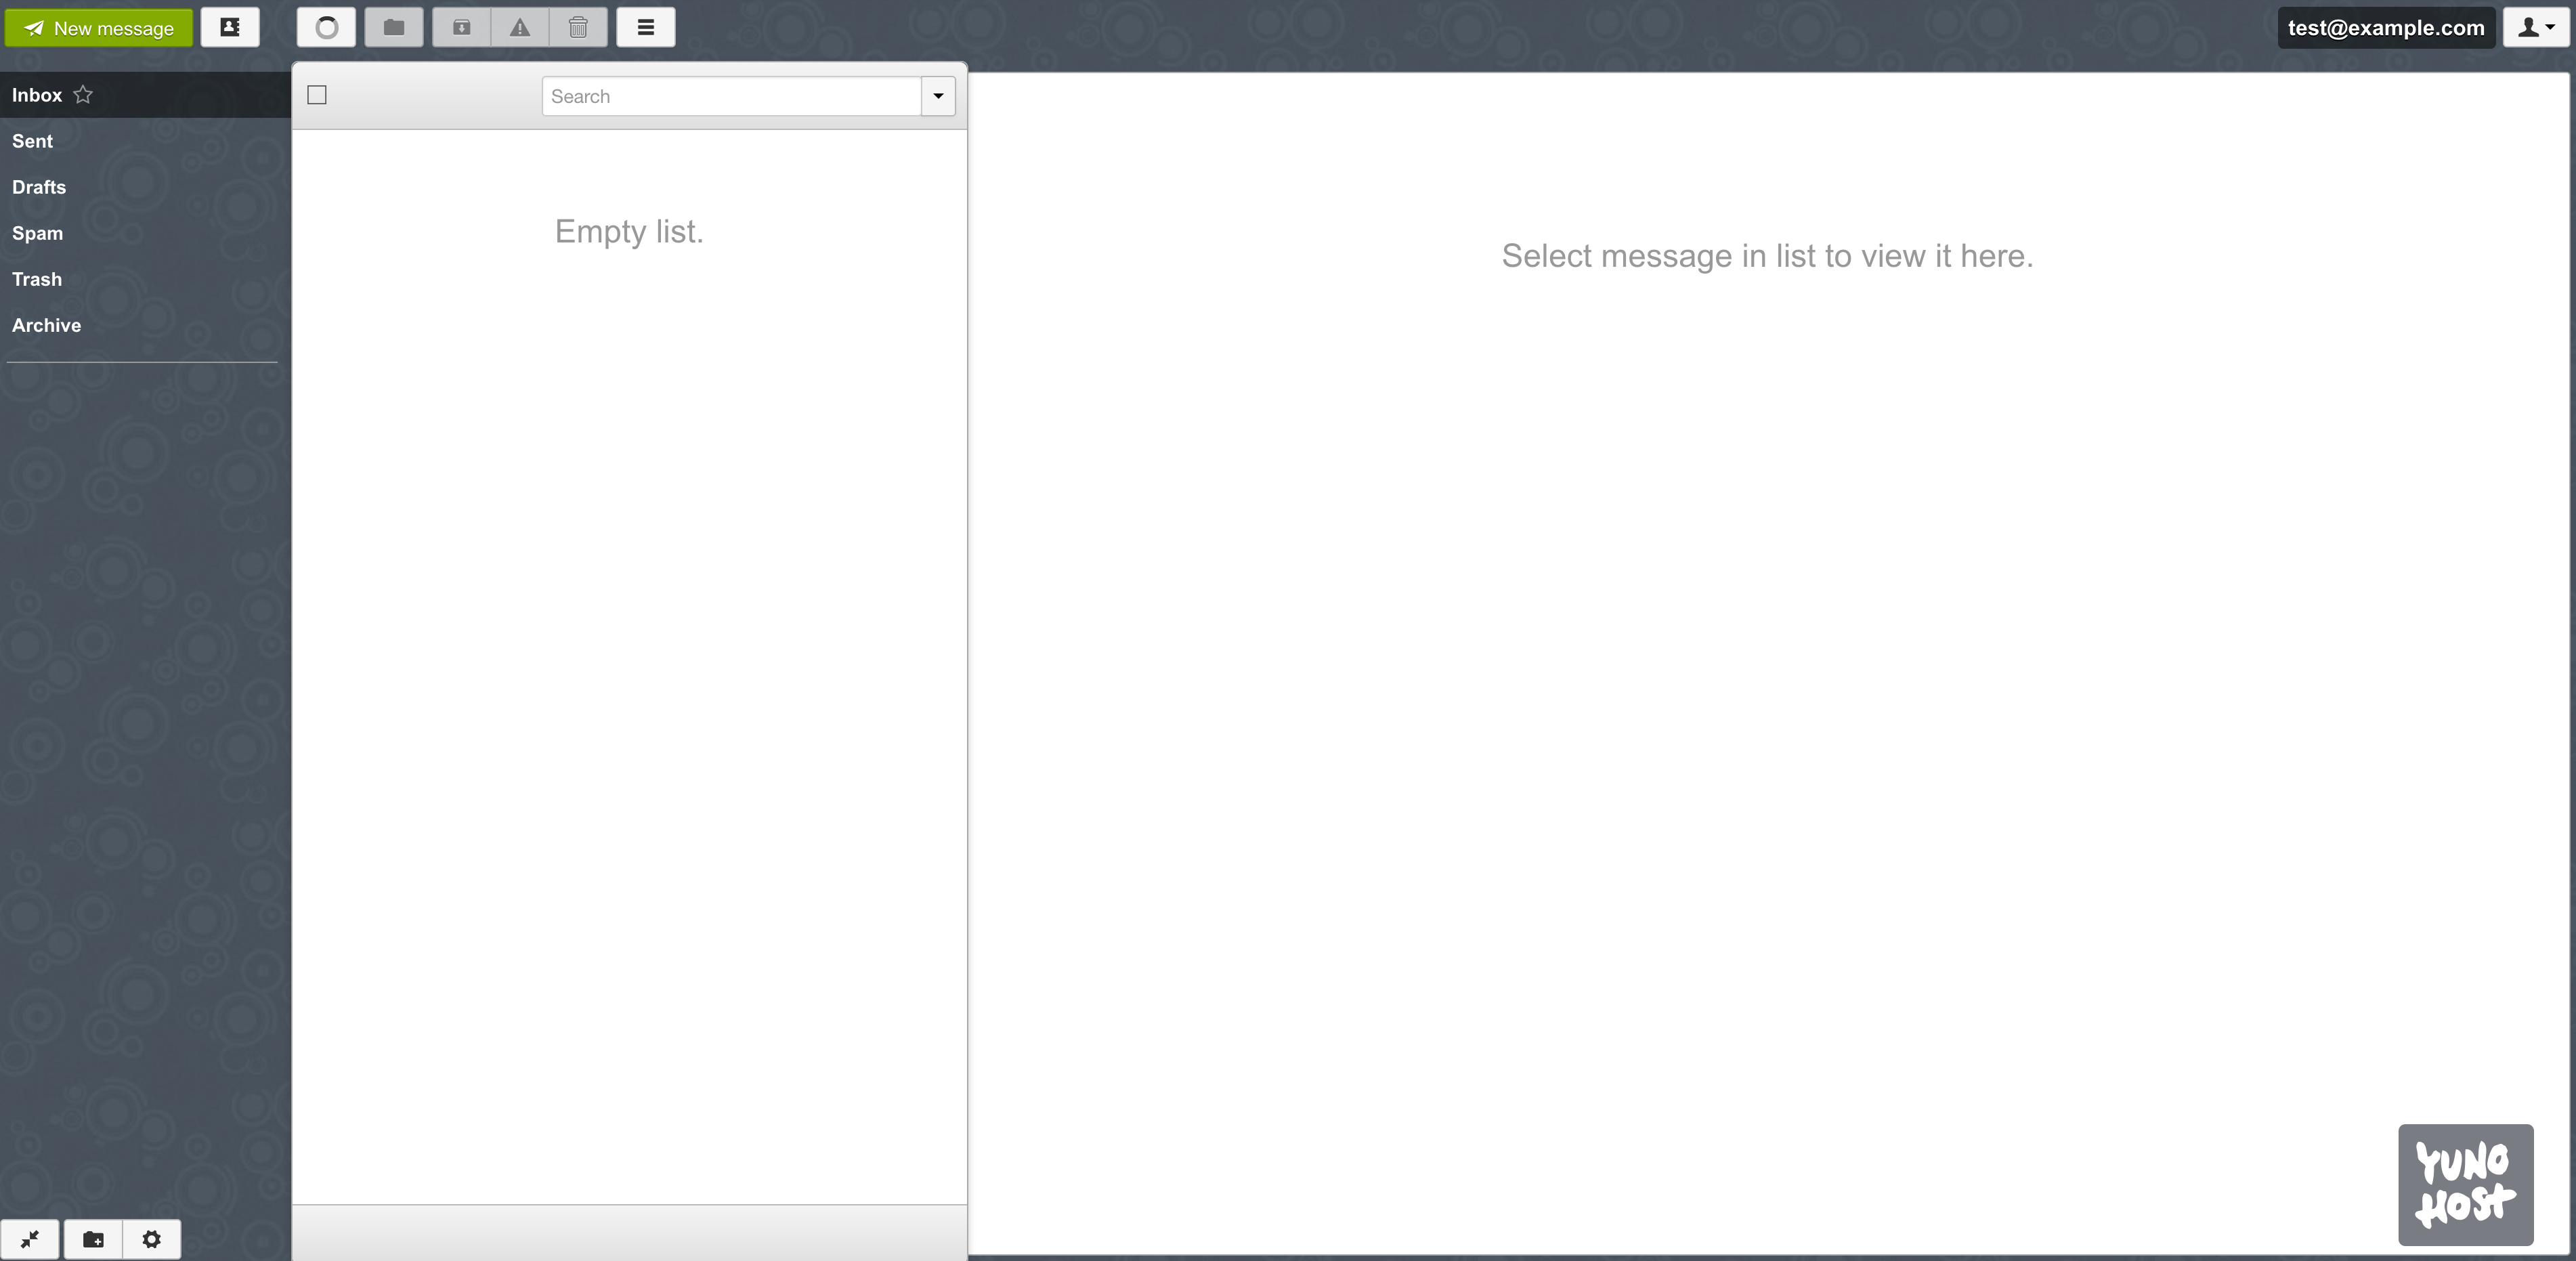
You've installed Rainloop. Open a new browser tab and navigate to the path you chose for the application (example.com/rainloop). You will see the Rainloop main dashboard.
You can repeat Step 4 to create more users and install further applications as you wish.
In the Applications section of the admin panel, it is also possible to install custom applications from third parties by pulling from GitHub repositories.
You now have a secure YunoHost instance configured on your server.
Conclusion
In this tutorial, you have installed YunoHost on your server, created an email account, and installed an application. You have a central place to host all your applications alongside each other, including a webmail client to check your email. See the YunoHost website for a full list of applications, both official and unofficial. Also see the official Troubleshooting guide that provides information on services, configuration, and upgrades to YunoHost.


